How to build your own solar pool heater in just a few steps :

The solar-rapid pool heating kit is suitable for almost any size and surface.

You get exactly the materials YOU need.

Read the instructions first (even if it’s difficult 😉 ) to avoid time-wasting assembly errors.

1. glue the CLASSIC distribution tubes together and fit the retaining profiles at regular intervals
Solar pool heating Installation step 1
2. unwind the solar-rapid 25 tube from the roll and cut to length.
Solar pool heating Installation step 2
3. place the ends of the tubes on the nipples of the distribution tube and clip the tubes into the openings of the support profiles - the solar surface is now ready.
Solar pool heating Installation step 3
4. simply roll up the absorber and take it to the place of use (garage roof, etc.).
Solar pool heating Installation step 4
5. the special connection system connects the absorber to the water circuit and integrates the solar controller ready for connection.
The professional connection system makes it easy to overcome protrusions, gutters, etc.

Connecting the manifold to the filter unit

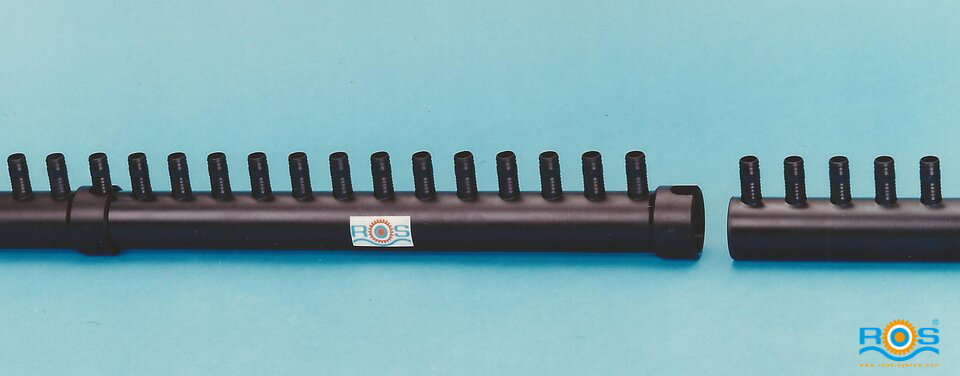
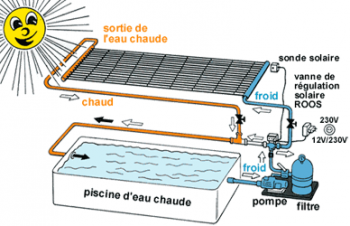
The ROOS® automatic solar control valve uses its sensors to test the outdoor and pool temperatures.

In a single operation, you filter and heat your pool. The ROOS® automatic control valve manages this operation.

It automatically opens and closes the water circuit through the manifold.

Connecting the manifold to a separate pump


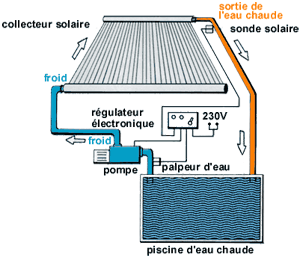
The control system manages this operation.
Use: for pools with an integrated filter unit.